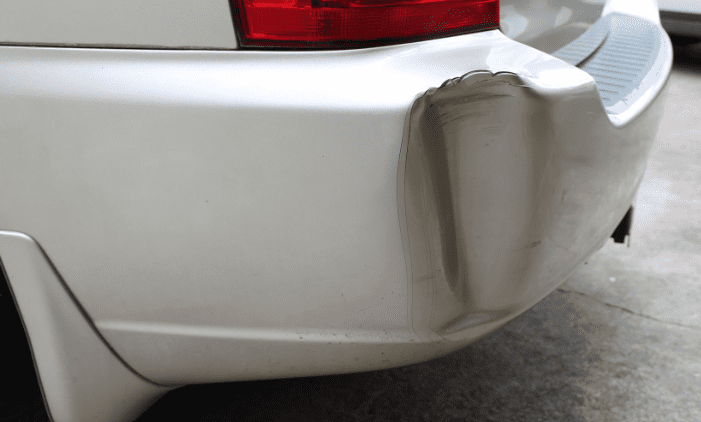
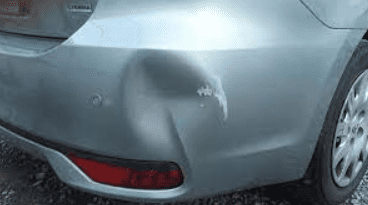
If you’ve found yourself faced with the frustrating sight of a plastic bumper dent repair, fear not. Plastic bumper dent repair is a task you can tackle yourself, saving both time and money.
Table of Contents
Togglesteps of plastic bumper dent repair
In this comprehensive guide, we’ll break down the process into ten manageable steps, empowering you to restore your car’s aesthetic appeal with ease.
1: Assessing Plastic Bumper Damage
Before diving into the repair process, it’s crucial to assess the severity of the damage. Examine the dent closely, determining whether it’s a minor imperfection or a more substantial issue that may require professional assistance.
2: Gathering Essential Tools
Prepare for the repair by gathering the necessary tools. These include a heat gun, plastic filler, sandpaper, automotive primer, high-quality automotive paint matching your car’s color, and a polishing compound for the finishing touches.
3: Using a Heat Gun to Prepare
Begin the repair process by using a heat gun to warm the affected area. This softens the plastic, making it more pliable and easier to manipulate. Hold the heat gun a few inches away from the surface, moving it around evenly.
4: Massage and Shape the Dent
With the plastic warmed up, gently massage and shape the dent back to its original form. Apply consistent pressure, working from the edges towards the center. Be patient and meticulous during this step to achieve optimal results.
5: Applying Plastic Filler
For deeper plastic bumper dent repair, apply a suitable plastic filler. Ensure the filler matches the color of your bumper. Using a putty knife, spread the filler evenly over the damaged area. Once applied, allow it to dry according to the manufacturer’s instructions.
6: Sanding for a Smooth Finish
After the filler has dried, use sandpaper to smooth the surface. Start with a coarse grit and gradually move to finer grits for a polished finish. This step ensures the repaired area seamlessly blends with the rest of the bumper.
7: Priming the Surface
Before applying paint, prime the repaired area for better adhesion. Automotive primer creates a smooth surface, enhancing the longevity and durability of the paint job. Follow the primer manufacturer’s guidelines for drying time.
8: Choosing the Right Automotive Paint
Select a high-quality automotive paint that precisely matches your car’s color. Shake the spray can well and apply the paint evenly over the primed surface. Maintain a consistent distance from the bumper to achieve a uniform finish.
9: Final Touches with Polishing
Once the paint has dried, give your bumper a finishing touch with a polishing compound. Apply the compound using a soft cloth, buffing the surface to achieve a glossy, factory-like appearance.
10: Admire Your Flawless Bumper
Congratulations! You’ve successfully navigated the plastic bumper dent repair process. Stand back and admire your handiwork as your car’s bumper now gleams, free from the unsightly dent that once marred its appearance.

DIY Plastic Bumper Dent Repair: Fix Your Ride Without Breaking the Bank
Plastic bumpers are a common sight on modern cars, and while they offer some advantages over their metal counterparts, they’re also more susceptible to dents and dings. But before you take your car to a professional body shop and shell out a small fortune, there are a few DIY methods you can try to fix those unsightly bumper blemishes yourself.
Before You Begin
It’s important to remember that not all dents are created equal. Some may be too deep or in awkward locations to be repaired effectively at home. If the dent is near a headlight, taillight, or other sensitive area, it’s best to leave it to the professionals.
For minor dents in inaccessible areas, however, there are a few simple techniques you can try with common household items or inexpensive tools.
Method 1: The Heat and Pressure Technique
This classic method involves softening the dented plastic with heat and then gently massaging it back into shape. Here’s what you’ll need:
- A hairdryer or heat gun
- A pair of gloves (optional)
- A soft cloth
- Start by cleaning the area around the dent with soap and water.
- Put on your gloves if you’re using a heat gun, as it can get quite hot.
- Hold the hairdryer or heat gun about 6 inches away from the dent and move it back and forth in a circular motion for 30-60 seconds. Be careful not to overheat the plastic, as this can cause it to melt or warp.
- Once the plastic is warm and pliable, gently massage the dent with your fingers or a soft cloth, working from the edges inwards.
- Continue heating and massaging until the dent is mostly gone.
- Let the plastic cool completely before touching it again.
Method 2: The Plunger Power
Believe it or not, a household plunger can be a surprisingly effective tool for popping out small dents in plastic bumpers. Here’s how it works:
- Wet the plunger cup and place it over the dent.
- Make sure the plunger is creating a good seal around the dent.
- Pull the plunger handle sharply and quickly.
- With any luck, the dent should pop out. If not, repeat steps 1-4 a few more times.
Method 3: The Dent Puller
For dents that are too deep for the heat and pressure or plunger methods, a dent puller can be a good option. Dent pullers are available at most auto parts stores and come in a variety of styles. Some common types include:
- Suction cup dent pullers: These are the most user-friendly type of dent puller and are ideal for shallow dents.
- Screw-in dent pullers: These pullers require you to drill a small hole into the dent, which can be a bit more intimidating for DIY beginners.
- Glue-on dent pullers: These pullers use a strong adhesive to attach to the dent, and then you can use a T-bar or slide hammer to pull the dent out.
Tips for Success
- Work in a warm, well-lit area.
- Take your time and be patient. Don’t try to force the dent out too quickly.
- If you’re not sure which method to use, start with the heat and pressure technique. It’s the safest and most gentle option.
- Be careful not to scratch the paint when you’re working on the dent.
- If you’re not comfortable repairing yourself, it’s always best to take your car to a professional body shop.

Benefits of DIY Plastic Bumper Dent Repair
1. Cost-Effective Solution
Repairing your plastic bumper at home saves you money compared to seeking professional help. Invest in the right tools, and you’ll be well-equipped for future minor repairs.
2. Time-Efficient
DIY repairs allow you to address the dent at your convenience, eliminating the need for appointment scheduling and long waits at auto body shops.
Plastic bumper dent repair in Houston TX
In Houston, TX, plastic bumper dent repair is a breeze with our expert services. Our skilled technicians specialize in restoring your vehicle’s aesthetic appeal swiftly and efficiently. Using state-of-the-art techniques, we address dents with precision, ensuring your bumper looks flawless. Trust us for top-notch plastic bumper dent repair in Houston, TX, and drive with confidence, knowing your car showcases its best side.
Remove Scratches From Black Plastic Bumper? Step-By-Step Process
Why choose our body shop for Plastic bumper dent repair in Houston TX
When it comes to plastic bumper dent repair in Houston, TX, Westside Collision Center stands out as the premier choice. Here are four compelling reasons to entrust us with your vehicle:
- Expertise: Our skilled technicians boast extensive expertise in plastic bumper repair, ensuring a flawless outcome.
- State-of-the-Art Facilities: Equipped with cutting-edge tools and technology, our facility enables precise and efficient dent restoration.
- Quality Craftsmanship: At Westside Collision Center, we pride ourselves on delivering top-notch craftsmanship, ensuring your bumper looks as good as new.
- Customer Satisfaction: Our commitment to customer satisfaction is unparalleled. Experience friendly service and prompt solutions for a stress-free repair process.
Choose Westside Collision Center for unrivaled plastic bumper dent repair in Houston, TX – where excellence meets efficiency.
Conclusion for plastic bumper dent repair
Mastering plastic bumper dent repair empowers car owners to maintain their vehicle’s appearance without breaking the bank. With the right tools, a bit of patience, and attention to detail, you can achieve professional-looking results. Say goodbye to unsightly dents and hello to a flawless car exterior. Enjoy the satisfaction of a successful DIY repair, knowing you’ve saved both time and money in the process.


